Hey Raiders, Elias here, back at Rivalsector.com with another deep dive into the Rust Belt. Let’s be real for a second. In an extraction shooter like ARC Raiders, your skill is only half the equation. The other half? That sweet, sweet loot. The gear you extract with is what separates a free-loadout “rat” from a lobby-wiping “chad”. We are all in this brutal loop for the gear, the cash, and those ultra-rare blueprints.
But not all Points of Interest (POIs) are created equal. Dropping into the Hydroponic Domes expecting a quiet farm is a good way to donate your kit to the first squad you see. Knowing where to go, and why you are going there, is the most important skill you can learn.
I have been grinding my operators to the bone, testing runs, checking spawns, and cross-referencing my data. The result is this, my official loot tier list for ARC Raiders.
This list breaks down the best POIs based on a few key factors:
- Loot Quality: The tier of gear, components, and valuables you can find.
- Loot Density: How much loot is packed into one area.
- Risk: The chance of running into high-level bots or, more importantly, other players.
- Consistency: How reliably you can walk away with a full bag.
I am focusing on locations you can access without any special keys, so everyone can use this guide right now.
S-Tier: The Absolute Best
These are the high-risk, high-reward locations. You go here to get the best gear in the game, period. Expect to fight for it.
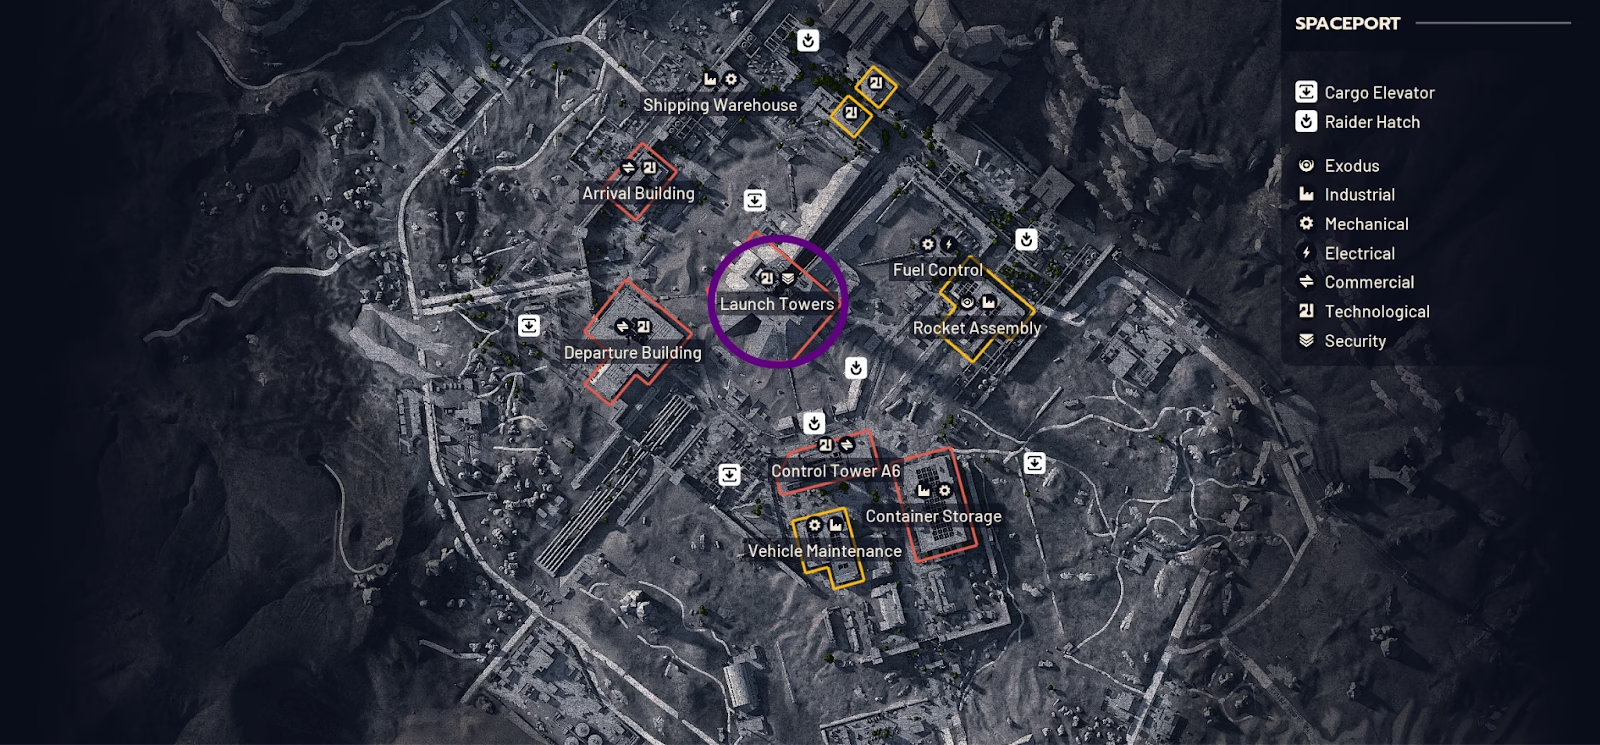
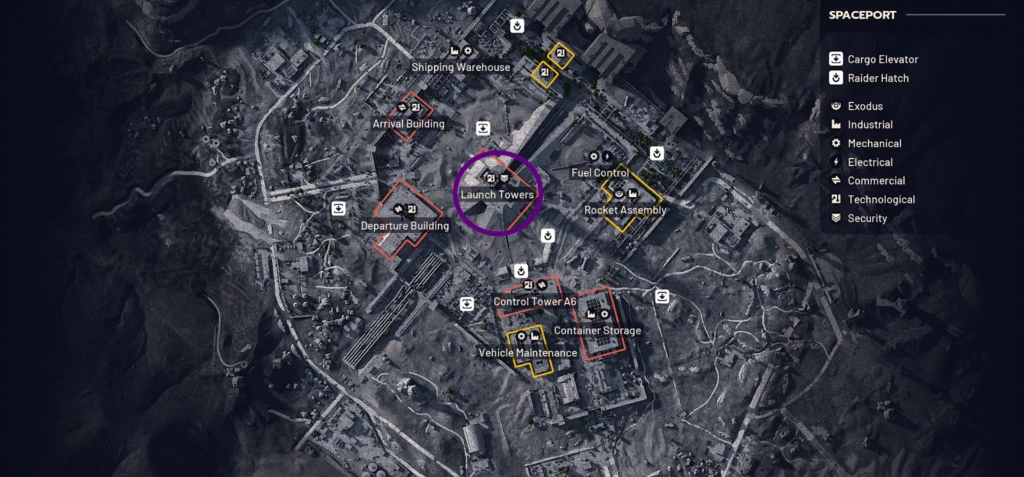
Spaceport: The Launch Tower (Event)
This is it. This is the big one. The Launch Towers on the Spaceport map are already a high-tier loot spot, but the special event here is what truly launches it into S-Tier. This is the spot you hit when you want to get overpowered in a single, glorious run.
Here is my breakdown of the event:
- Find the Fuel Cell: First, you need to find a heavy, carryable Fuel Cell. These have several spawn points around the base of the towers. I have found them under domes, inside shipping containers, and near vents.
- Insert the Cell: Haul the cell into the main tower and plug it into the power bank. This activates the doors and the zip lines to the top.
- Ascend and Secure: Take the zip line up. My pro-tip: have your squad mine the zip entrances immediately. You do not want another team joining the party unannounced.
- Activate the Chest: At the very top, on an exposed platform, you will find a large, caged chest. Interacting with it starts an alarm and a timer.
- Hide and Reset: This is the most critical step. Do not stay and fight. The game will spawn high-level bots, including Rocketeers, that will shred you. Run back inside, break line of sight, and let the bots reset.
- Claim Your Prize: Once the alarm stops and the bots have de-aggroed, sneak back out. The cage will be unlocked, revealing one of the best loot caches in the game. I have seen players pull the Tempest and other S-Tier weapons from this exact chest.
The risk here is extreme. You have bot-killing Rocketeers, and the alarm alerts every player on the map. But the reward is unmatched.
A-Tier: Consistently Great
These are my go-to locations. They offer fantastic loot, are great for specific goals, and are the bread-and-butter of any successful Raider.
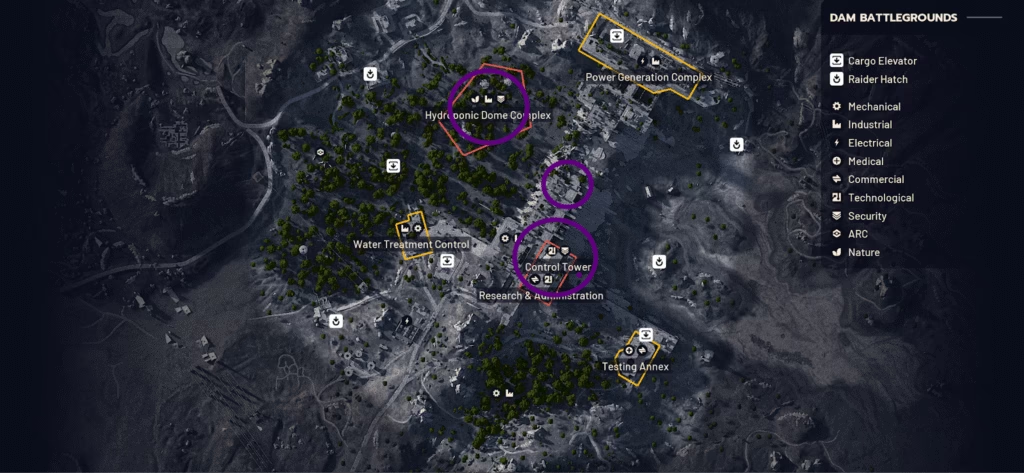
Dam: Control Tower / Research and Administration
This is probably the most balanced and popular A-Tier spot. The loot is heavily condensed in a multi-story building, so you can get in, loot up, and get out relatively fast.
What I love about it are the options. It has tons of cover for PvP, multiple zip lines for roof access, and even underground tunnels for a sneaky approach or escape. You can find high-end gear, meds, and lots of lockers. It is a hot drop, so be ready to fight, but it is a fight you can win with smart positioning.
Dam: Hydroponic Dome Complex
This POI is a bit of a trap. The open areas and small domes are a nightmare, with bots sniping you from everywhere. However, the real loot is not in the domes.
It is in the two large industrial buildings on the edge of the complex. These buildings are A-Tier for one reason: components. They are packed with red lockers and breach-and-search blocks. This is my number one farming spot for Light and Medium Gun Parts, Rusted Tools, and Industrial Batteries. It is heavily contested, so I recommend bringing a decent kit. But if you can lock down one of these buildings, you will fund your crafting benches for days.
Dam: Floodgates (Breach Rooms)
This is my personal hidden gem. It is a fantastic “rat” run that has A-Tier loot quality with B-Tier risk. While everyone else rushes the Control Tower, you can slip into the Floodgates.
Inside, you will find a series of rooms locked behind breachable doors, all connected by bridges you activate with a switch. The first room alone has multiple spawns for weapon caches. I have pulled Ospreys and blueprints from this room on multiple occasions. The follow-up rooms are full of medical gear and more breach boxes.
Even better, at the end of the line, you can jump down and climb a ladder to a hidden loft with cylindrical loot crates. It is quiet, safe, and unbelievably profitable.
B-Tier: Solid and Reliable
These spots are not as flashy as the S or A-Tiers, but they are the workhorses. They are perfect for beginners, low-risk cash runs, or just a safe start to a raid.
Buried City: Santa Maria “Stash House”
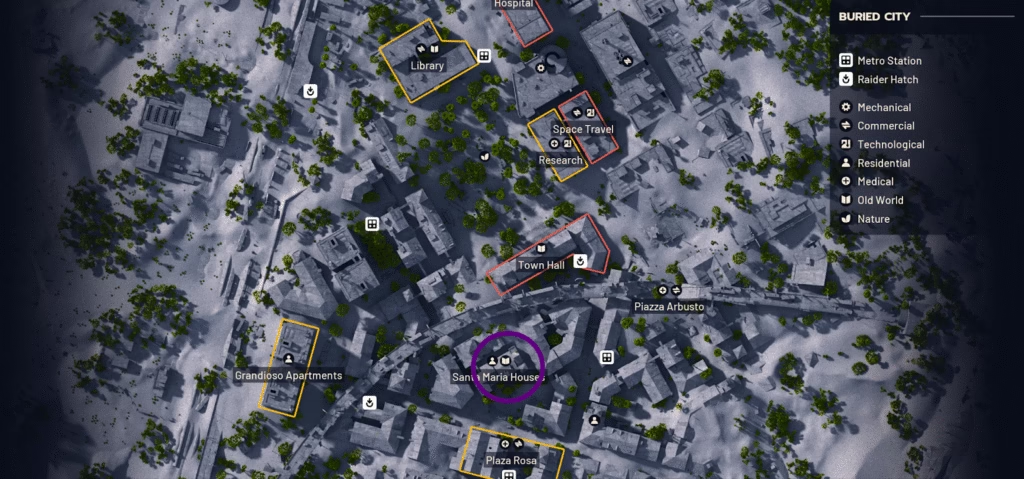
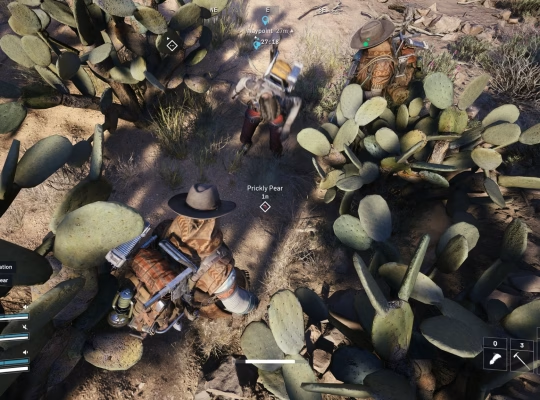
This is the ultimate beginner run. West of the Santa Maria Houses on the Buried City map, there is a small, unassuming building that 99% of players ignore.
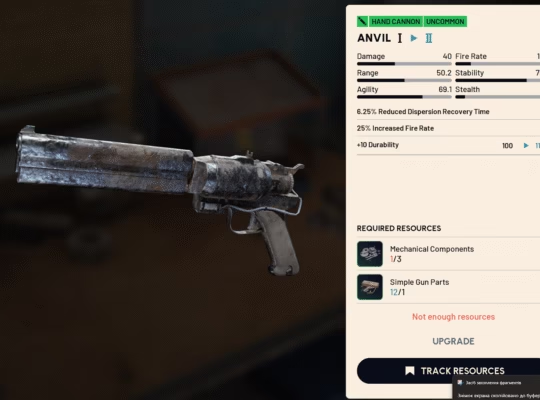
I have speed-run this POI with a free loadout countless times. You can be in and out in under 10 minutes. The building is filled with high-value trinkets. I consistently average around 30,000 currency per run, and I have even found Anvils and blueprints here. If you are broke and need to build your stash, this is your new home.
Blue Gate: Central Underground

This POI is a strange one. The loot quality is A-Tier, maybe even S-Tier. But the location is a nightmare. It is a massive, sprawling network of maintenance tunnels that is very hard to learn.
It is also swarming with the toughest ARC bots in the game, and the map spawns often put you very far away. The loot is spread out, not dense, making it a bad spot for a quick run. However, I am putting it in B-Tier because it is an amazing, high-risk location for a patient solo player. You can spend the entire raid down there and never see another soul, just methodically cleaning the place out.
Buried City: Space Travel and Research
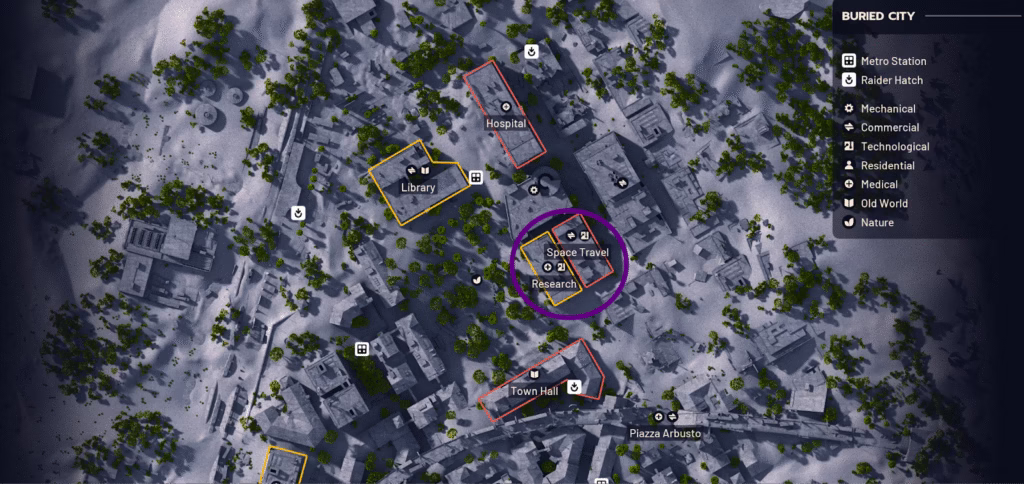
These two buildings are located near the center of the Buried City map. The loot is decent, with lots of desks to check. However, its central location means you get a ton of player traffic, and the loot itself can be very hit-or-miss. It is not a bad place to pass through, but I would never make it my primary target.
Know Your Containers: What to Look For
Knowing where to go is only half of it. You need to know what to look for. Your eyes should be scanning for these rare containers at all times.
- Cream Bag (Green Insignia): If you see one, loot it. These have a very high chance of dropping blueprints. I found a Torrent LMG blueprint in one myself.
- Rectangular Battery: A heavy item, often found at Electrical Relay Stations. Pick it up, find the nearby generator, and deposit it. It unlocks a device that drops at least two weapons and ammo.
- Weapon Box (Long, Green/Metallic): This is a guaranteed weapon. These are most common in high-risk red zones.
- Ammo Case (Dark, Yellow Insignia): Often found near weapon boxes, these are full of ammo.
- Cylindrical Loot Crate: These long, golf-bag-looking containers often hold good utility items and blueprints. I find them a lot in hidden spots, like the Floodgate route.
My Quick-Look Tier List Table
Here is a simple breakdown for you to reference. Use this to plan your drops.
| Tier | Location | Map | Best For (Primary Loot) |
| S | Launch Tower (Event) | Spaceport | S-Tier Gear, Weapons |
| A | Control Tower | Dam | High-Tier Gear, PvP |
| A | Hydroponic Domes (Industrial) | Dam | Crafting Components, Gun Parts |
| A | Floodgates (Breach Rooms) | Dam | Weapons, Meds, Safe Loot |
| B | Santa Maria “Stash House” | Buried City | Cash, Trinkets, Beginner Runs |
| B | Central Underground | Blue Gate | High-Tier Gear (Slow, Risky) |
| B | Space Travel & Research | Buried City | Decent Mixed Loot, High PvP |
Conclusion: Loot Smart, Not Just Hard
And that is my breakdown, Raiders. As you can see, there is a perfect loot spot for every objective. If you are broke, hit the Stash House. If you need components, farm the Hydroponics buildings. And if you are feeling brave and want the best gear, gear up and try to crack the Launch Tower event.
This game is all about knowledge. Knowing these routes and POIs will give you a massive edge. Now you have the intel.
What is your personal loot tier list? Did I miss your secret, S-Tier stash? Let me know in the comments below, I am always hunting for new intel.
For more guides, reviews, and breakdowns just like this one, make sure you keep it locked to our ARC Raiders category here on Rivalsector.com.
Now get out there and fill those bags. Elias out.