Hey there, gamers, it is Elias from Rivalsector.com, and today I am diving into a piece of gaming hardware that is often overlooked but is absolutely critical to our setup, the gaming mouse. We have all been there, you unbox a new Logitech mouse or you are trying to reconnect your current one after a battery change, and for some reason, it just will not connect. It is a frustrating moment that can sideline you from your next match. But do not worry, I am here to walk you through exactly how to put your Logitech mouse into pairing mode and get you back in the game. It is a process that is far simpler than you might think, and once you know the tricks, you will be a master of connectivity.
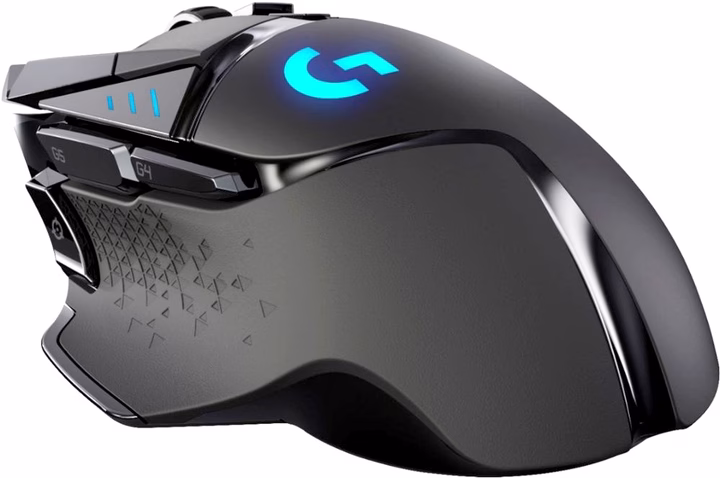
I have spent countless hours with different Logitech peripherals, from the G502 LIGHTSPEED to the MX Master series, and I can tell you that while the process is mostly the same, there are some nuances depending on your specific model and the technology it uses. Whether you are using a USB receiver or Bluetooth, understanding the right steps is key. So, let us get into the nitty-gritty of it. My goal here is to give you a comprehensive guide that works for most Logitech mice, so you can stop fumbling with your hardware and get back to what really matters, dominating the leaderboards.
The Two Main Ways Logitech Mice Connect
Before we jump into the “how-to,” it is important to understand the two primary ways Logitech mice connect to your PC. This knowledge will guide you on which steps to follow.
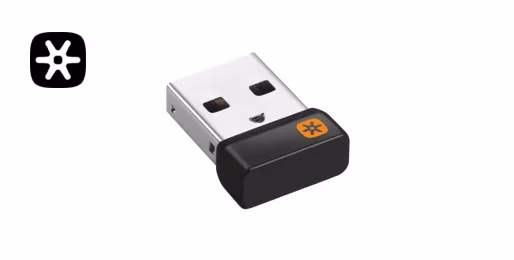
- Logi Bolt or Unifying Receiver: This is the most common method for gaming mice. Logitech provides a small USB receiver that you plug into your computer. The mouse then connects to this receiver using a proprietary 2.4 GHz wireless protocol. This method is known for its low latency and reliable connection, which is exactly what we need for competitive gaming.
- Bluetooth: Many Logitech mice, especially those designed for productivity or portability, also support Bluetooth connectivity. This is a great option if you want to connect your mouse to a laptop or tablet without taking up a USB port. The downside is that Bluetooth can sometimes have a slightly higher latency than a dedicated wireless receiver, but for most everyday tasks, you will not notice a difference.
Some advanced models, like the MX Master 3S, offer both options, giving you the flexibility to choose based on your setup. Always check the product specifications to see what connectivity options your mouse has.
Method 1: Pairing with a USB Receiver (Logi Bolt or Unifying)
This is the method you will use for the majority of Logitech’s gaming lineup. It is a straightforward process that usually involves a button press and a piece of software.
Step 1: Plug in the Receiver
First things first, you need to plug the USB receiver into an available USB port on your PC. I always recommend using a port on the back of your desktop tower for the most stable connection, as ports on the front or a USB hub can sometimes be less reliable.
Step 2: Power on Your Mouse
Turn on your Logitech mouse. Most mice have a physical power switch on the bottom. Flip it to the “on” position.
Step 3: Initiate Pairing Mode
This is the crucial step. The way you initiate pairing mode depends on the specific mouse model.
- Logi Bolt/Unifying Mice: For many modern gaming mice, there is a dedicated button on the bottom of the mouse, often labeled with a “connect” or “pairing” symbol. Press and hold this button for a few seconds. You should see a small LED light on the mouse start to blink rapidly. This indicates that the mouse is now in pairing mode and is actively searching for a receiver.
- Mice with Multiple Device Channels: Some mice, like the G604 or G903, have multiple connectivity channels that you can switch between. They usually have a button to cycle through channels (1, 2, or 3). To put them in pairing mode for a new receiver, you typically press and hold the channel button you want to pair to, until the corresponding LED starts blinking.
Step 4: Use the Logitech Options+ or G HUB Software
While some mice might connect automatically, it is always a good idea to use the official software to finalize the pairing.
- Logi Bolt: For mice that use the Logi Bolt receiver, you will want to use the Logitech Options+ software. Open the application, and it will guide you through the process of adding a new device. It is a very intuitive interface.
- Unifying Receiver: If your mouse uses a Unifying receiver, you will need the Logitech Unifying Software. This is a small, standalone utility that can be downloaded from Logitech’s website. Open the software, and it will prompt you to turn your mouse off and then on again to pair it.
- G HUB: For most of Logitech’s G series gaming mice, you will use the Logitech G HUB software. This application is your central hub for all things gaming hardware. Open G HUB, navigate to the “Connect New Device” option, and follow the on-screen prompts. It will detect your mouse in pairing mode and connect it to your PC.
Once the software confirms the connection, the LED on your mouse will turn solid, and you are good to go.
Method 2: Pairing via Bluetooth

Pairing a Logitech mouse with Bluetooth is a different process that relies on your computer’s built-in Bluetooth settings.
Step 1: Turn on Bluetooth on Your Computer
First, ensure that Bluetooth is enabled on your PC.
- Windows: Go to Settings > Bluetooth & devices, and make sure the Bluetooth toggle is on.
- macOS: Go to System Settings > Bluetooth, and ensure it is turned on.
Step 2: Put the Mouse in Bluetooth Pairing Mode
This is where you again need to find the correct button on your mouse.
- Dedicated Pairing Button: Many Bluetooth mice have a small, round button on the bottom, often labeled with the Bluetooth logo. Press and hold this button for a few seconds. The LED on the mouse will begin to blink, signaling that it is ready to be discovered.
- Multi-Device Switch: As I mentioned before, some mice have a switch to cycle between channels. If you are using a new channel for Bluetooth, switch to it, then press and hold the button for a few seconds until the LED blinks.
Step 3: Add the Device on Your PC
Now, you need to tell your computer to find the mouse.
- Windows: In the Bluetooth & devices settings, click on “Add device” > “Bluetooth.” Your computer will start scanning for nearby devices.
- macOS: In the Bluetooth settings, the list of devices will automatically populate.
Your Logitech mouse should appear in the list. It might show up with a name like “Logitech MX Master 3S” or something similar. Click on it, and your computer will complete the pairing process. The LED on the mouse will turn solid, and you are all set.
Troubleshooting Common Pairing Issues
Sometimes, things just do not go as planned. Here are some quick tips for troubleshooting common pairing problems I have encountered.
- Batteries: This sounds obvious, but a low battery is the number one cause of connectivity issues. Make sure your mouse is fully charged or has fresh batteries.
- Interference: Other wireless devices like Wi-Fi routers or cordless phones can sometimes interfere with the 2.4 GHz signal. Try to pair your mouse away from these devices.
- USB Port: If you are using a receiver, try plugging it into a different USB port. Sometimes a faulty port is the culprit.
- Re-Pairing: If your mouse suddenly loses its connection, try going through the pairing process again from scratch. It is a simple but effective fix.
- Firmware: Ensure your mouse’s firmware is up to date. You can check for updates in the Logitech G HUB or Options+ software.
Here is a quick reference table for the different pairing methods:
| Pairing Method | Mouse Type | Software Needed | Common Models |
| USB Receiver | Gaming Mice | Logitech G HUB, Unifying Software, Options+ | G502 LIGHTSPEED, G Pro Wireless, MX Master 3S |
| Bluetooth | Productivity, Multi-Device | None (Uses OS Bluetooth Settings) | MX Master 3S, M720 Triathlon |
Bottom Line
Putting your Logitech mouse into pairing mode is a fundamental skill for any PC gamer. Whether you are setting up a new device or troubleshooting a connection issue, knowing the correct steps will save you a lot of frustration. The key is to first identify whether your mouse uses a USB receiver or Bluetooth and then follow the specific steps for that method. With a little bit of practice, you will be able to get your mouse connected in seconds, leaving you more time to focus on what matters most, the game.I hope this guide has been helpful. If you have any more questions about gaming hardware or need advice on your next peripheral purchase, be sure to check out our Gaming Insights section here at Rivalsector.com. My team and I are constantly sharing new tips and tricks to help you get the most out of your gaming experience. Now go and get that Victory Royale.